Step 2:Connect – To your Wi-Fi Network
Booting Up Your Device for the First Time (Factory Default State)
When you turn on your CryptoTicr for the first time, it will be set to its factory default settings. As it has not yet been configured to connect to your home Wi-Fi network, the device will display a sequence of screens to guide you through the configuration process.
After the initial boot-up screen has been displayed, the steps required to configure your CryptoTicr to access your home Wi-Fi network will be shown. The final screen will provide specific instructions on using a device such as a smartphone, tablet, or computer to temporarily connect to the CryptoTicr’s Wi-Fi network. This step is crucial for entering your home Wi-Fi network details into the device.


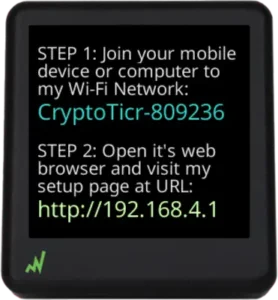
Join your Smartphone or Computer Device to CryptoTicr's Wi-Fi Network
You will connect to your CryptoTicr’s Wi-Fi network just like you would with any standard Wi-Fi network. While connected to your CryptoTicr’s network, your device will disconnect from its current network and may display a “No Internet” message. This is normal and expected. Once the setup process is complete, CryptoTicr will have the necessary information to connect to your home Wi-Fi network, and your device will automatically reconnect to the previous network.
After connecting your smartphone or computer to your CryptoTicr’s Wi-Fi network, your device’s browser may automatically open and direct you to the CryptoTicr Wi-Fi Configuration Page at http://192.168.4.1. If this does not happen, you will need to manually open your browser and navigate to this address to continue the setup process.
Examples: iOS, Android, Windows and Linux
The procedure for joining a Wi-Fi network remains largely consistent across different device platforms. To view what to expect for your specific device, click the corrisponding selection below to display the relevant screens and steps for your device.
Connect to your CryptoTicr’s Wi-Fi Network
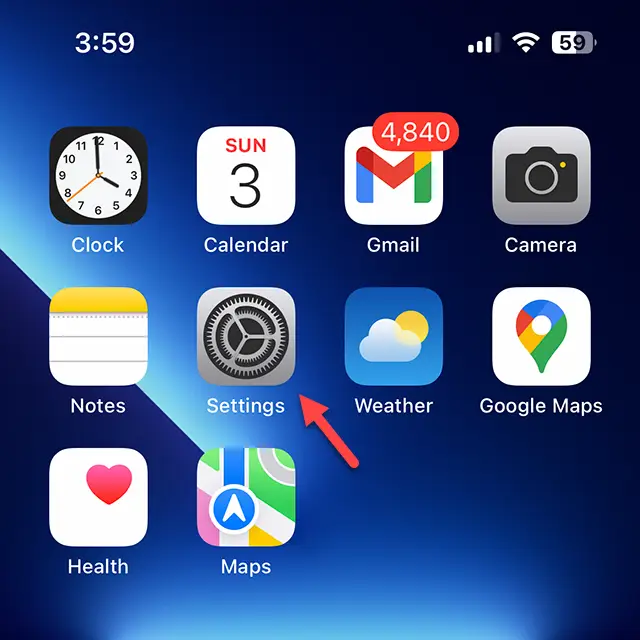
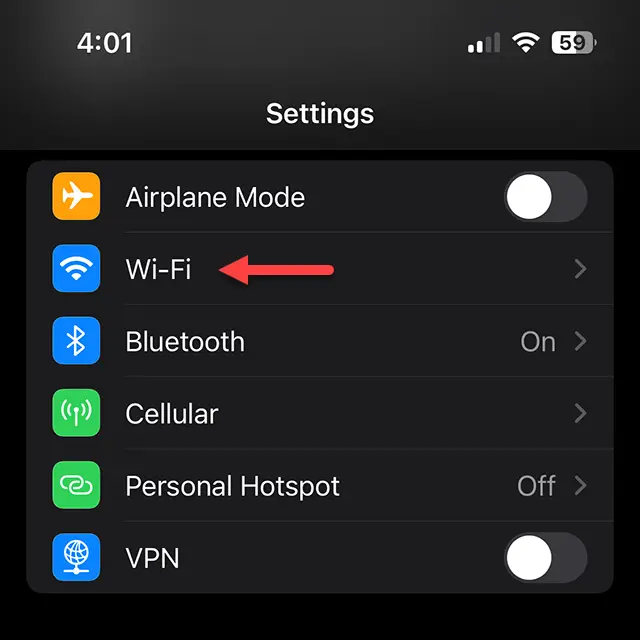
From your Home screen, go to Settings > Wi-Fi. Make sure Wi-Fi is turned on. Your device will automatically search for available Wi-Fi networks.
Tap the name of the CryptoTIcr Wi-Fi network that you want to join. After you join the network, you’ll see a blue checkmark next to the CryptoTicr network name and the connected Wi-Fi signal-strength indicator icon in the upper-right corner.
From your Home screen, click on Settings
From your Settings screen, click on Wi-Fi
Make sure Wi-Fi is turned on. Click CryptoTicr-*

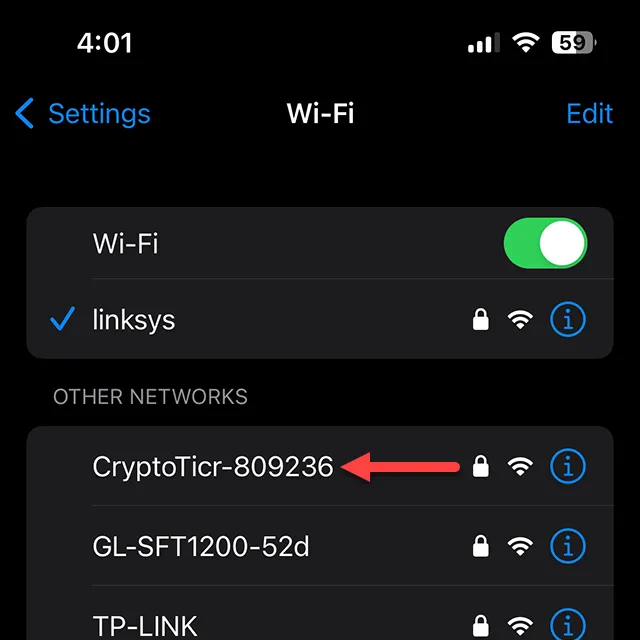
* The six numbers at the end are unique and will vary by unit.
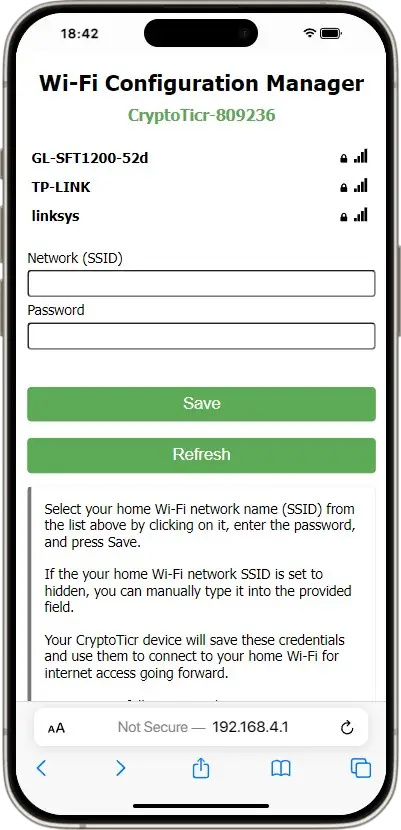
Once joined, CryptoTicr's WiFi Configuration Manager page should appear in your Apple device's web browser. If it doesn't, navigate your browser to URL http://192.168.4.1
From this page, select your home Wi-Fi network from the list, enter it's password and click Save.

Connect to your CryptoTicr’s Wi-Fi Network
From your Home screen, go to Settings > Wi-Fi. Make sure Wi-Fi is turned on. Your device will automatically search for available Wi-Fi networks. Tap the name of the CryptoTIcr Wi-Fi network that you want to join. Before you can join the network, you will be asked to enter the network’s password. The password is “satoshis”, all lower case, without the quotes. After you join the network, you’ll see a blue checkmark next to the CryptoTicr network name and the connected Wi-Fi signal-strength indicator icon in the upper-right corner.
From your Home screen, click on Settings
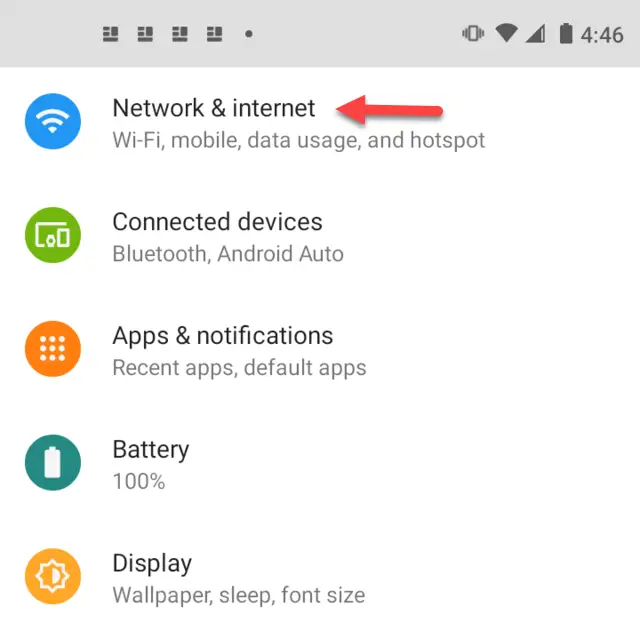
From your Settings screen, click on Network & internet.
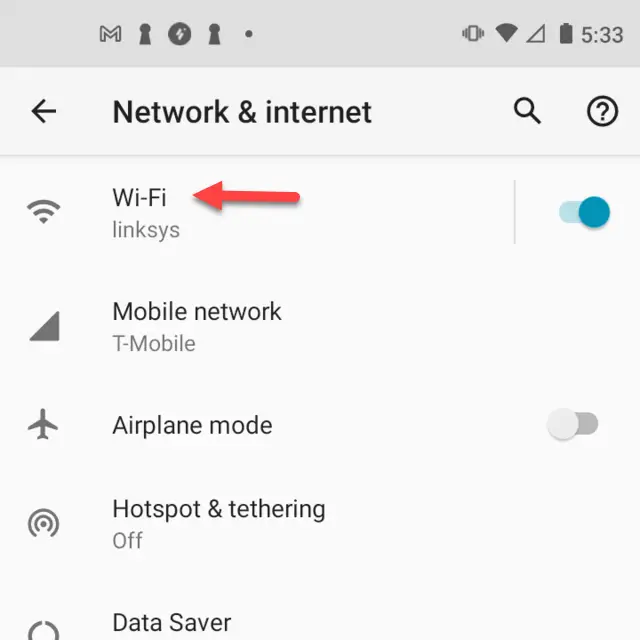
Make sure Wi-Fi is turned on. Click Wi-Fi.

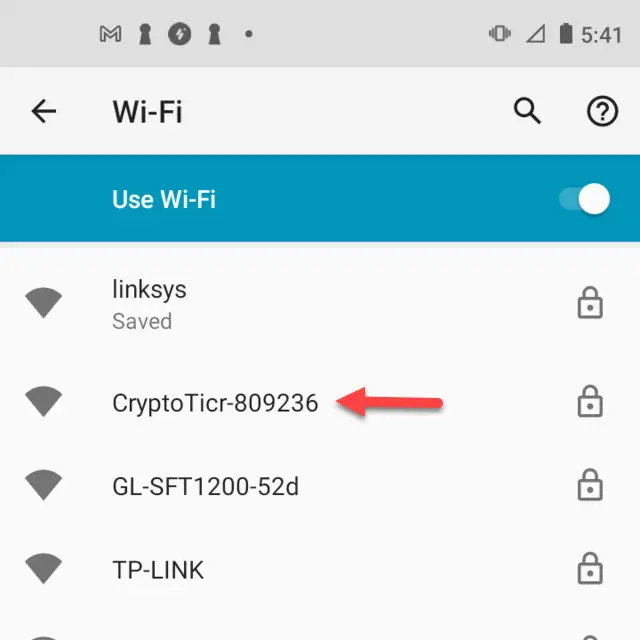
Select the CryptoTicr-* network.
Once joined, CryptoTicr's Wi-Fi Configuration Manager page should appear in your Android devices's web browser. If it doesn't, navigate your browser to URL http://192.168.4.1
From this page, select your home Wi-Fi network from the list, enter it's password and click Save.

* The six numbers at the end are unique and will vary by unit.
Connect to your CryptoTicr’s Wi-Fi Network
From your Home screen, go to Settings > Wi-Fi. Make sure Wi-Fi is turned on. Your device will automatically search for available Wi-Fi networks. Tap the name of the CryptoTicr Wi-Fi network that you want to join.
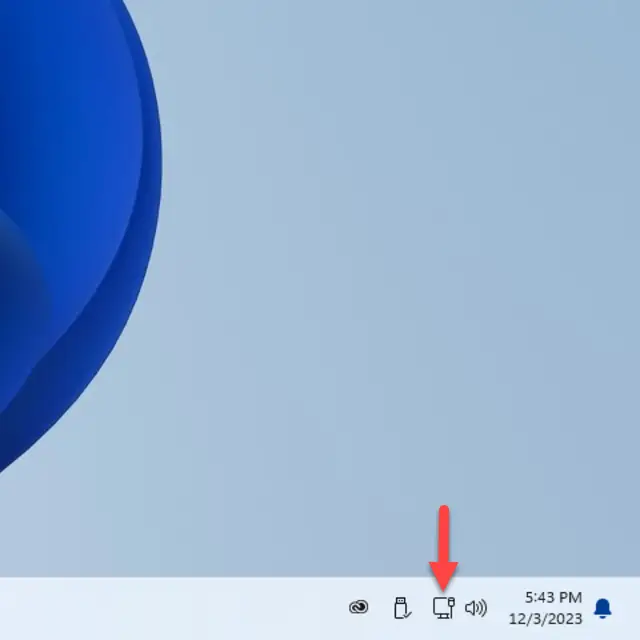
Click the Network Icon in the Task Bar
From your Settings screen, click on Network & internet.
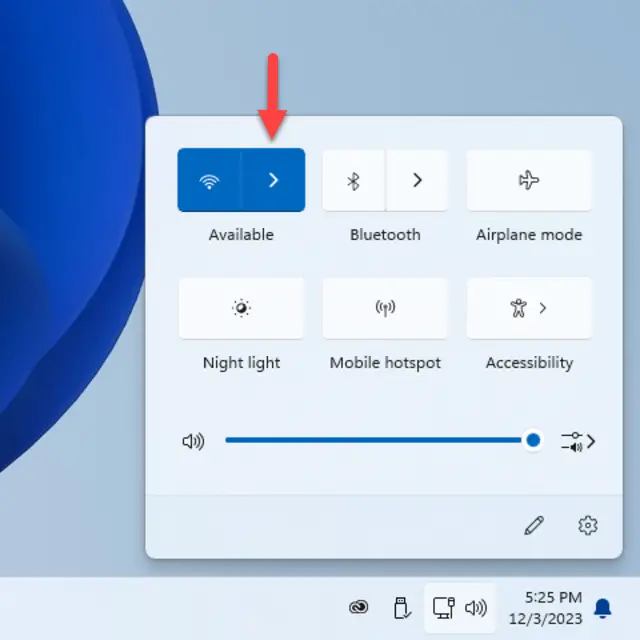
Make sure Wi-Fi is turned on. Click Wi-Fi.

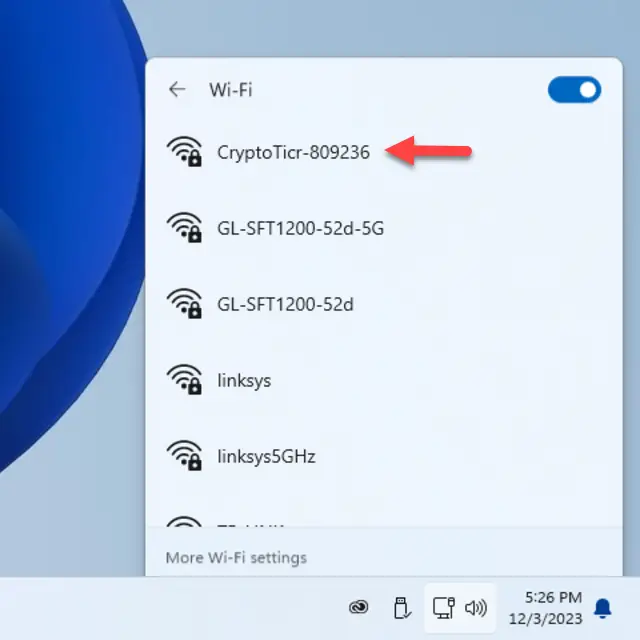
Select the CryptoTicr-* network.
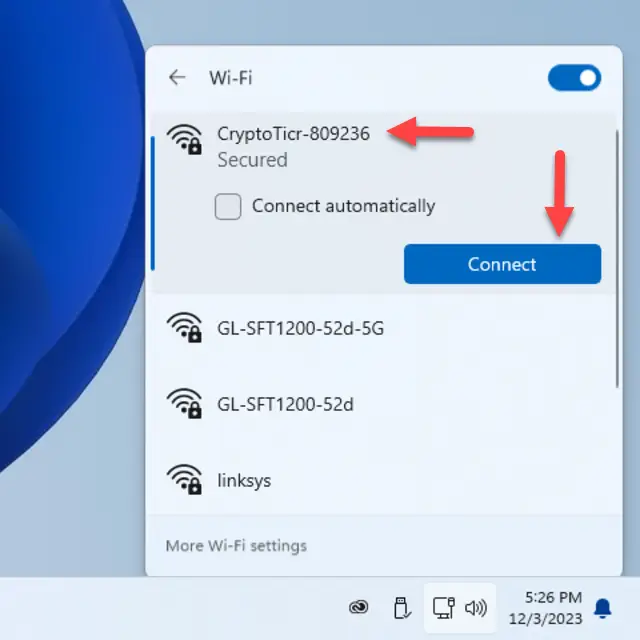
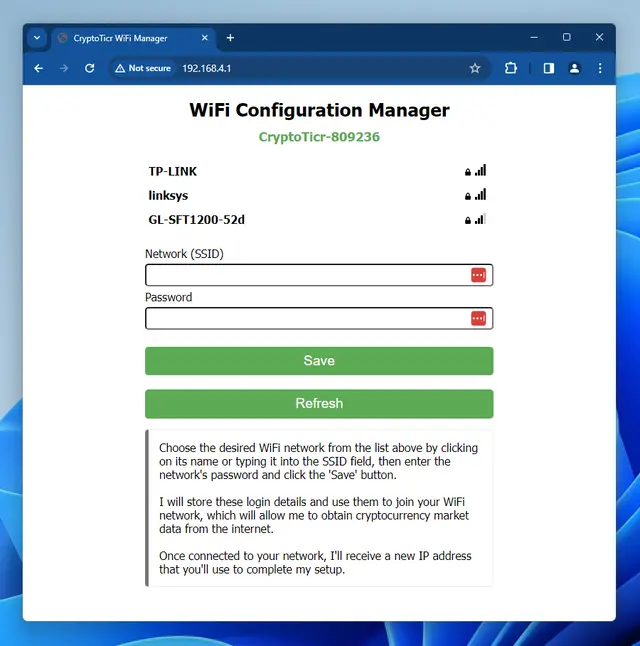
Once joined, CryptoTicr's Wi-Fi Configuration Manager page should appear in your Windows computer's web browser. If it doesn't, navigate your browser to URL http://192.168.4.1
From this page, select your home Wi-Fi network from the list, enter it's password and click Save.
* The six numbers at the end are unique and will vary by unit.
Connect to your CryptoTicr’s Wi-Fi Network
From your Home screen, go to Settings > Wi-Fi. Make sure Wi-Fi is turned on. Your device will automatically search for available Wi-Fi networks. Tap the name of the CryptoTicr Wi-Fi network that you want to join.
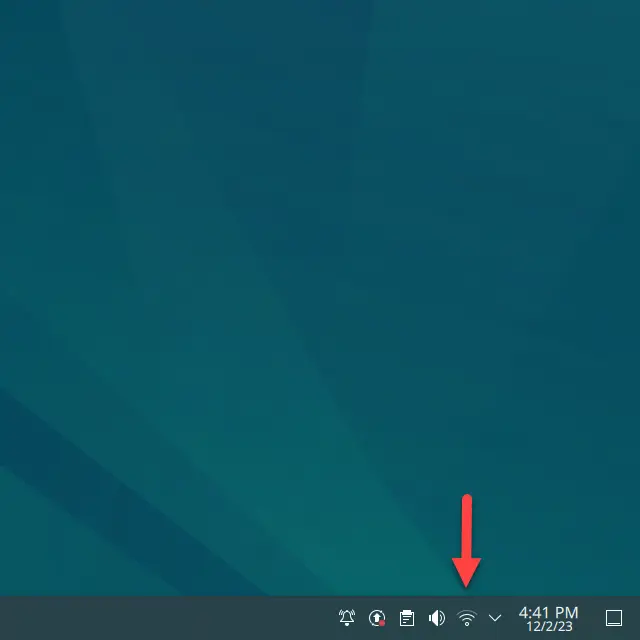
Click the Network Icon in the Task Bar
From your Settings screen, click on Network & internet.
Make sure Wi-Fi is turned on. Click Wi-Fi.


Select the CryptoTicr-* network.

Once joined, CryptoTicr's Wi-Fi Configuration Manager page should appear in your Windows computer's web browser. If it doesn't, navigate your browser to URL http://192.168.4.1
From this page, select your home Wi-Fi network from the list, enter it's password and click Save.

* The six numbers at the end are unique and will vary by unit.
Connect to your CryptoTicr’s Wi-Fi Network
From your Home screen, go to Settings > Wi-Fi. Make sure Wi-Fi is turned on. Your device will automatically search for available Wi-Fi networks. Tap the name of the CryptoTIcr Wi-Fi network that you want to join. Before you can join the network, you will be asked to enter the network’s password. The password is “satoshis”, all lower case, without the quotes. After you join the network, you’ll see a blue checkmark next to the CryptoTicr network name and the connected Wi-Fi signal-strength indicator icon in the upper-right corner.
Click the Network Icon in the Task Bar
Select the CryptoTicr-* network.

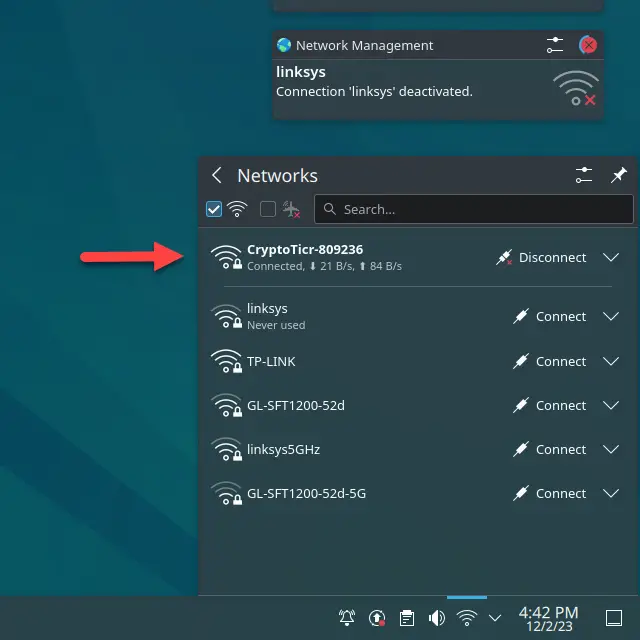
* The six numbers at the end are unique and will vary by unit.
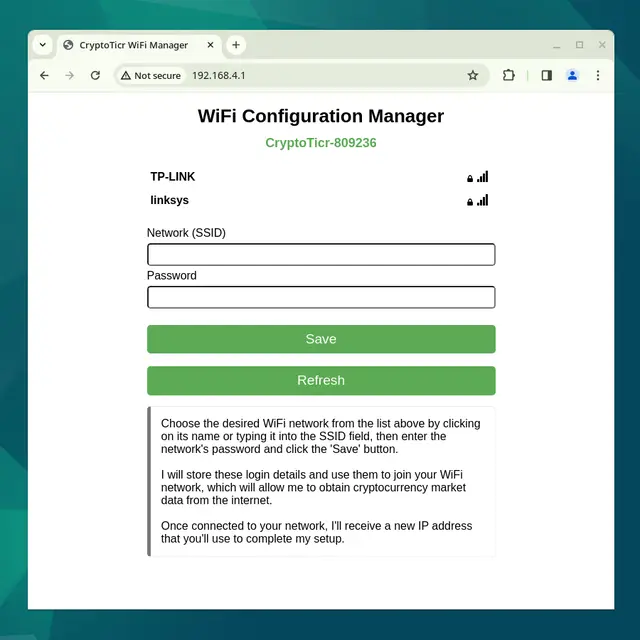
Once joined, CryptoTicr's WiFi Configuration Manager page should appear in your Linux computer's web browser. If it doesn't, navigate your browser to URL http://192.168.4.1
From this page, select your home Wi-Fi network from the list, enter it's password and click Save.
Now That Your Device Has Joined CryptoTicr's Wi-Fi Network
Your device might automatically start it’s browser and navigate to the Wi-Fi Configuration Manager web page shown below upon joining the CryptoTicr Wi-Fi network. If it does not, start you’re device’s browser and navigate to this page by typing in the URL address http://192.168.4.1
Now it’s time to select the desired Wi-Fi network for your CryptoTicr to use going forward. The 2.4Ghz Wi-Fi networks within its range and their signal strength will be shown. Select the network you’d like to use from the ones displayed, input it’s password and press the “Save” button.
If the information you’ve entered is correct and CryptoTicr can login to your home Wi-Fi network, it will save the credentials you have entered, perform a system reboot and start back up connected to your home Wi-Fi network. It will then display the URL address (it’s IP address on your home network) that you will navigate to with your device’s browser to control the application (select coins to view, etc) going forward. If there is a problem connecting to your home network (usually an incorrect password), CryptoTicr will remain on the instruction page and you should try again. Example successful completion of this step and an unsuccessful attempt are demonstrated below for clarity.
Example CryptoTicr Output of Successful and Unsuccessful Connection Attempts
Successful Connection

CryptoTicr connected.
Upon pressing "Save", if everything worked and CryptoTicr was able to connect to your Wi-Fi network, the CryptoTicr output will look like this.
Unsuccessful Connection

CryptoTicr couldn't connect.
CryptoTicr will remain on this page and not reboot. You can re-enter the information by clicking the "Click here to try again" link shown on you phone (or computer) screen.
Now That Your CryptoTicr Has Joined Your Home Wi-Fi Network
Your CryptoTicr has rebooted and is now displaying it’s IP address. You can now launch a browser on any smartphone or computer that is on your home Wi-Fi network and browse to this IP address to access the main CryptoTicr Device Settings page. You will navigate your browser to this IP address from now on, whenever you want to adjust CryptoTicr’s settings.
* Do not enter the IP address of 192.168.10.100 as shown on the image below. This address is only example for illustration purposes and it is not the IP address of your CryptoTicrt. Enter the IP address displayed on your CryptoTicr.
Once Configuration Settings (i.e. Display Mode, Coins) are Saved, Enjoy!
CryptoTicr remembers its settings, so after you’ve saved your coin selections for the very first time, CryptoTicr will use the saved settings to configure itself upon reboots. It will skip past the initial configuration screen and begin to display the coins you have selected. CryptoTicr displays its IP address upon every restart. Navigate your smartphone or computer, which is also connected to your home Wi-Fi, to the IP address shown in a web browser whenever you want to alter any of CryptoTicr’s settings.


